Wednesday, December 31, 2008

Merry Christmas & Happy New Year!


Sorry its been a while since my last post. I've been busy with studying for a professional certification for my day-job. I wish it were baking related but it's not.

My only tip for the winter baker is to ensure your sourdough starter stays warm overnight (at least 68 degrees). I've noticed my rise-times have extended since my house gets cold at night. A good trick my mom taught me is to put the starter someplace odd, like an interior bathroom. A fellow baker friend of mine says he likes to use his dishwasher. Whatever works for you, just keep the sourdough warm :)

I also recommend trying a few good cookie recipes in-between baking bread (more on that later).

Cheers & Happy Holidays!
-Matt the weekend baker

Sunday, November 23, 2008

Tools of the Trade


I always smile when people ask if I have a bread machine when the topic of baking bread comes up. I normally don't advertise that I'm a weekend baker, but inevitability over some sort of meal the topic of baking will somehow rise to the surface (pun intended).

When I answer "no" to the bread machine question the predictable response is "oh, wow, so do you have a big mixer?" This is where the conversaton can go one of multiple directions. I DO have a mixer and I have used it to make dough in the past, but I don't use it now.

Most people have seen documentaries on TV where they see bakeries with huge stand mixers making hundreds of pounds of dough at once. They also have the experience of seeing the bread machines in the appliance isle of their local big-box outlet (Target, etc...)

99% of everyone out there has NO IDEA that bread baking can be so simple. To them bread is something they think very little about and the barriers to entry appear to be too high.

My tools:
* Large bowl
* Large Spoon to mix
* Measuring Cups (dry & wet)
* Ingredients (Flour, Water, Yeast, Salt)
* Saran-Wrap (or equivalent)
* Parchment Paper & Rice Flour [Optional]
* Non-terrycloth Towel
* Dutch Oven (cast-iron pot with a lid) [Optional]
* Oven capable of 450 degree heat for 2+ hours

The irony is that 90% of most homes have everything on this list already in their house. The only exception is usually yeast, which is an increasingly rare item for people to have.

Walking into a friend's home and baking bread with items they had on-hand is a great magic trick (if you aren't staying overnight I recommend my Focaccia Bread Recipe.

The whole point of this entire post is that baking bread kept humanity alive for thousands of years and is easier than you think it is.

-Matt the Weekend Baker

Sunday, November 9, 2008

Never too busy to Bake bread...


Things have been crazy busy at work recently. A good friend of mine (who is also a baker) commented that he hoped I would have time to bake bread this weekend (the last two weekends I've had to work).

My response was simple - I'm NEVER too busy to bake bread, but sometimes I just don't find time to post to my blog.

We talked for a bit about baguettes and the time & temperature techniques for them. I've been so enthralled with the dutch oven concept that I had almost forgotten all the tricks I learned for baguettes.

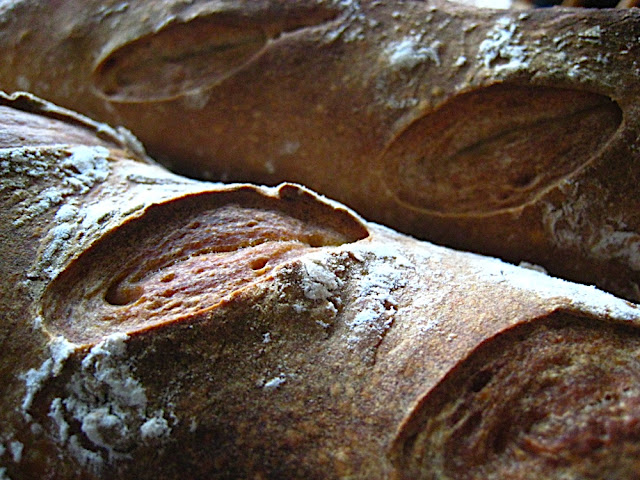
Basically the same recipie for sourdough (or regular dough) works. When you are shaping the loaf be sure to cut it in half and roll it into a baguette form, pressing a seam down the middle with your thumbs and then folding it over so the seam side is down. They bake at 450 for about 35 minutes, but in the first three minutes you must spray water into the oven every three minutes. This is where having a large hot iron pot in the oven is helpful because it instantly turns the water into steam. This helps develop the crust for the baguettes.

Give it a try yourself!
-Matt the weekend baker

Saturday, October 25, 2008

A new Sourdough starter feeding strategy


So I've been experimenting recently with a slight modification to my sourdough starter mixture. I've blogged about my sourdough starter several times before and if anything I think this is just another argument to the axiom that sometimes there is no right answer.

I noticed that my standard:
Save 1/4 cup starter, mix with 1 cup water & 1 cup AP flour
Seemed to be a bit 'soupy' which after rising for 8-16 hours seemed to be well mixed, but not quite as active as I am used to seeing.

My alteration is by trying:
Save 1/4 cup starter, mix with 3/4 cup water & 1 cup AP flour
This makes a thicker starter, more the consistency of play-doh. I've noticed that the ticker mixture rises better (easily doubling or sometimes tripling), plus it holds its shape more.

This thicker starter adds a richer more developed taste to my bread, which is always a welcome addition!


-Matt the weekend baker

Saturday, October 11, 2008

An update to a revolutionary recipe


The original Jim Lahey recipe for no-kneed bread published by Mark Bittman published in November 2006 (covered in this post) kicked off the revolution. Home bakers (like me) everywhere were inspired to give it a try.

Now Mark Bittman has revisited the technique and has talked with Jim Lahey about publishing an updated version of the recipe that started it all. Here is a link to the story:

No-Knead Bread: Not Making Itself Yet, but a Lot Quicker

Jim Lahey didn't approve of toying with the ratios and I think I agree.

The basic idea is that the more yeast you throw in, the shorter the rise-time. This is fairly basic "baking 101", but for the experienced baker the longer the rise the more developed the flavor of the loaf.

Of course there's always a trade-off when baking good bread vs baking quick bread. I've even blogged about this in the past. If you want a good quick bread then choose a recipe that's suited for it (and heavily flavored already). The whole point of fresh baked bread (french, sourdough or wheat) is to really TASTE the nutty flavor of the flower.

-Matt the weekend baker

Saturday, October 4, 2008

Four Basic Ingredients


At a dinner the other night a friend of mine lamented that I was stuck on baking. It does seem strange that a recipe with just FOUR basic ingredients could be so interesting and so challenging.

* Flour
* Water
* Yeast
* Salt

That's really all there is to it. Bread is about as simple as you can get, yet it's permutations are almost endless. Thinking it's simple is like comparing wine to grape juice.

Bread to me has a fascinating history (http://en.wikipedia.org/wiki/Bread) and has been baked by bakers for thousands of years. One of my favorite semi-historical reference is from the HBO mini-series "Rome" when one of the main characters (Titus) says "good bread this". I laughed at that moment because the bread the character was eating was essentially the same bread I was eating.

Four simple ingredients, two of which can be improvised (salt & yeast). Ten Billion combinations (ok a bit of a hyperbole there) and only a few hundred (or a few thousand) chances to try to get it right. Sounds fun to me!


-Matt the Weekend Baker


Side Note:
As proof that I am not stuck on bread, my culinary skills include (but are not limited to):
* Baked Eggs
* Omelets
* Crepes
* Eggs Benedict
* Sweet Rolls
* Dutch Babies (German Pancakes)
* Grilled Steaks
* Grilled Vegetables
* Grilled Salmon
* Cookies
* Gary's Salsa

Saturday, September 27, 2008

The value of bread


An interesting thought occurred to me the other day... how much is good bread worth? We buy sandwich bread for $3.99 at the grocery store, yet here is a rough breakdown of how much home-made bread costs:


IngredientMeasurePurchase WeightPurchase CostCost per GramPer Loaf Cost
Salt15737$1.00$0.0014 $0.02
Buckwheat Flour10907$3.28$0.0036 $0.04
All-Purpose Flour504536$5.79$0.0013 $0.06
White Whole Weat Flour502268$5.49$0.0024 $0.12
Bread Flour3402268$5.49$0.0024 $0.82
Water3253780$1.00$0.0003 $0.09
Sourdough Flour (AP)
504536$5.79$0.0013 $0.06
Sourdough Water503780$1.00$0.0003 $0.01


$1.23


So the costs of the ingredients is clearly less than the store-bought bread, but what about the actual baking? My Kennmore 96413 is rated at 10 - 13.5 kW. Running at 450 degrees I'm going to assume I'm using 13 kW of juice, though the insulation on this oven is incredibly efficient so I don't think it's pulling the full load for my entire bake cycle. Power in our area goes for 7 - 9 cents per kWh, so at the worst case scenario I'm probably using $0.18 of electricty, bringing the grand total up to $1.41.

I don't drink coffee, but I'm fairly sure that's less than your average cup of joe.

-Matt the weekend baker

Saturday, September 20, 2008

Sourdough Starter Troubles (Chlorine & Chloramine)


So to my great surprise the sourdough starter I have been faithfully using for over a year has recently gone 'flat'. I will feed it per my usual schedule and it does rise, but it doesn't "bounce" to it's normal doubling.

As any good baker will know, a starter will show vigorous activity within the first hour and should double within 4-8 hours depending on the ratio of starter to water/flour it was fed.

I had a real mystery on my hands so I decided to try and figure out what happened. After a few experiments I narrowed the suspects down to temperature & water. I was able to eliminate the temperature variable by trying a cultivation in a stable tempature area with no sunlight (to minimize variations), so that just left water. I had been using the same tap water for over a year, but obviously something changed.

Our tap water is moderately hard, but normally calcium does not affect sourdough starters. Though my hypothesis was that maybe our local water municipality changed the percentage of chlorine in the water.

I tested this theory out by cultivating a new starter from some preserved starter I had saved for an emergency (more on that in another post). I cultivated this new starter with only bottled water. It was a bit more expensive than tap water but after a week it seemed to be showing strong results.

To double-verify my results I did one feeding of the new starter with tap water, and it had disastrous results. It killed a good portion of the starter.

While I was pleased that my hypothesis was confirmed I was still baffled at why tap water would suddenly become so hostile. It turns out that the water municipality had changed from Chlorine to Chloramine (which is a derivative, and more stable).

A quick check on Google confirmed this: http://www.sourdoughhome.com/startingastarter.html

Sourdough by it's nature is a hardy bacteria that can survive all sorts of different environments, but when it encounters chemicals that are anti-bacterial in nature it makes it hard to grow the way it should.

It looks like it's time to start experimenting with dechlorination, or I'll just buy bottled water by the jug.

All this trouble hasn't stopped me from baking 2-3 loaves per weekend, even with a semi-flat stater. Nothing can come between a baker and his bread.

-Matt the weekend baker.

Saturday, September 13, 2008

Measuring Ingredients

When you bake a few loaves you will start to realize the variables involved with baking. Time, temperature, humidity, weight, density, yeast concentration, water impurities, salt and water %.

One of the biggest variables in creating a good loaf is the percentage of water to flour. This percentage should be in the 65%-85% range.

As one of my favorite publications (Cooks Illustrated) published: Almost No-Knead Bread which is only the recipe, but the accompanying article described that going closer to the 65% water percentage actually helps with the no-knead recipes.

I find the best way to maintain this percentage is to weigh my ingredients vs measuring them. The best example of this is demonstrated in the picture below.


There are two cups of flour that look identical, but one is compacted and weighs 135 grams and the other weighs 180 grams. The 45 gram difference comes from the density of the flour.

I recommend weighing your ingredients for the most accurate baking results. If you don't have a scale handy, at least aerate your flour before use!

-Matt the Weekend Baker

Saturday, September 6, 2008

Sourdough Starters

A good friend asked me why my current sourdough isn't a patch on the first sourdough loaf I baked years ago. I explained it was because my original starter was a local wild variety, which did taste good but seemed to be lacking in its ability to double a loaf effectively.

Sourdough yeast isn't something you can just go down to your local supermarket and buy, it's something you have to grow and cultivate. That seems to scare most people away from giving it a try.

The internet has introduced a whole range of options for the hobbyist baker. If you simply Google "Sourdough Starter" you will see a wide range of options.

From the free Oregon Trail Sourdough

To the world traveling collection.

The King Arthur Flour variety.

I picked up mine from www.sourdoughbreads.com.


If you are adventurous and want to try your own here are a few sites to explore:
http://www.breadtopia.com/make-your-own-sourdough-starter/
http://www.thefreshloaf.com/node/233
A short video: http://www.youtube.com/watch?v=cusjbAtGzvg

Remember - once you have a sourdough starter you must feed it to keep it alive. You can hibernate it in your refrigerator, but you have to take it out a few days ahead of when you want to use it again.

-Matt the Weekend Baker

Saturday, August 30, 2008

Bread Flour vs All-Purpose Flour

So the unthinkable happened last night, I ran out of bread four. Normally I keep a fairly good supply on-hand but for some reason I forgot to buy more the last time I was at the grocery store.

This left me with a decision - should I:
a) Run out to the store (it was late at night so this wasn't a great option)
b) Use All-Purpose (AP) flour


Protein
5-8% cake flour
8-10% pastry flour
10-11.5% all-purpose flour
11-13% bread flour
14% and up high-gluten flour

I chose option B because not making bread would be even worse than going grocery shopping late at night.

So what is the difference between the two most common types of flour? It's different gluten/protein concentrations. AP is in the 10% range and Bread is in the 12% range, why do you want to have more gluten/protein? Crumb structure. The more gluten you have the longer the gluten bonds you can sustain.

Think about the difference between cake (5%) and a nice french bread (12%) and that's a good way to remember why bread bakers want higher percentages.

A great wiki reference on Flour: http://en.wikipedia.org/wiki/Flour

If you want to get started with bread baking and all you have is AP flour, give this recipe a try:
  • 15g Salt
  • 350g Flour (any type)
  • 350g Water
  • 10g Yeast
It's easier than you think! (trust me)

-Matt the Weekend Baker


Saturday, August 23, 2008

A visual step-by-step guide to Sourdough bread

I am a visual learner. I love step-by-step guides with pictures so I thought I would put together one of my own. This is a long post, but I think it will be educational.

1. Feed the Sourdough (the night before, follow my starter schedule) - top view
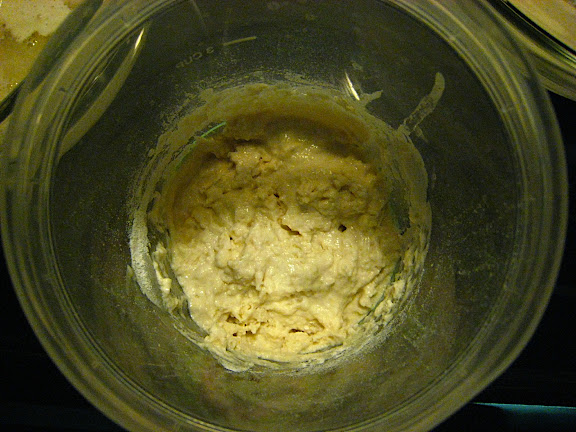


2. Side view, note the rubberband
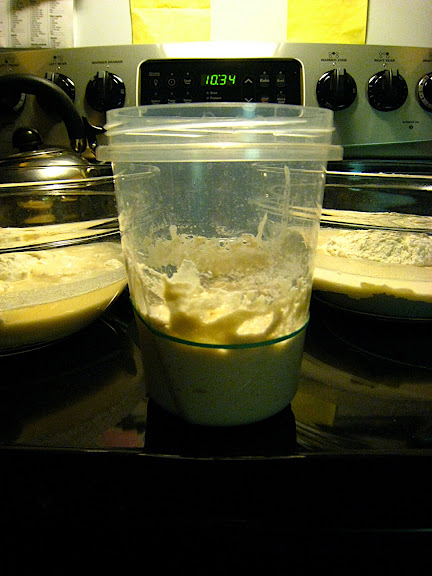


3. The next day


4. Mixing the dough, first zero the scale (on grams)
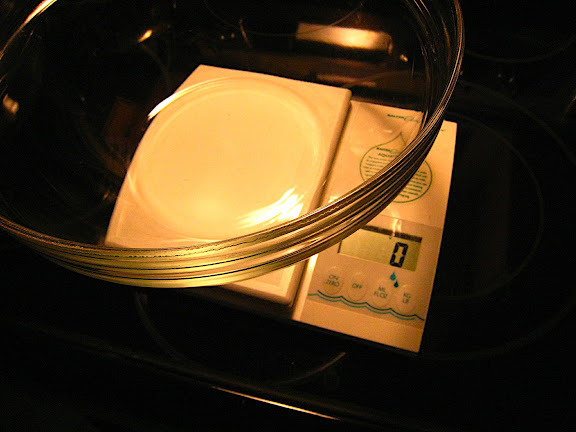


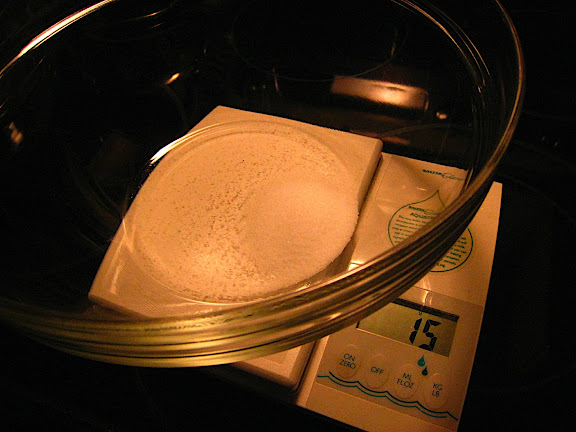
5. Start with 15g Salt then zero the scale again


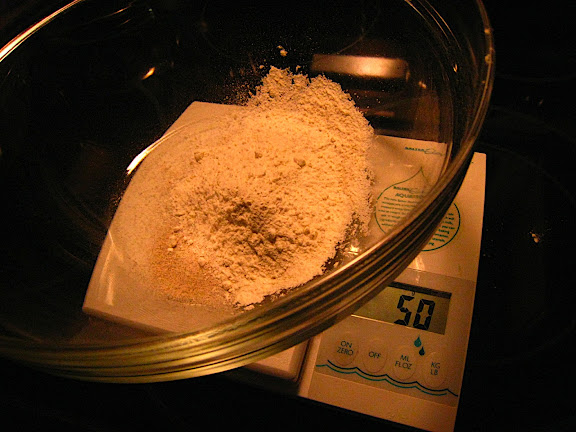
6. Add 50g of White Whole Wheat flour


7. Add another 50g of All-Purpose flour
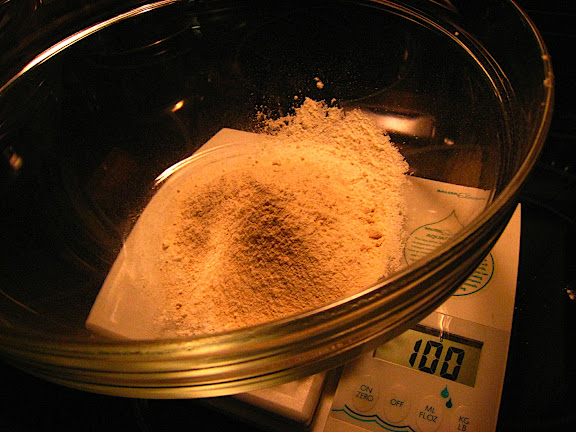


8. Throw in the 10g of Buckwheet and start adding regular Bread flour
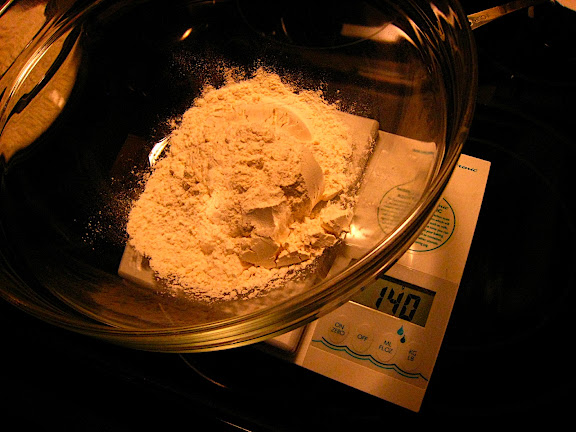


9. Add slowly until the total FLOUR amount is 450g
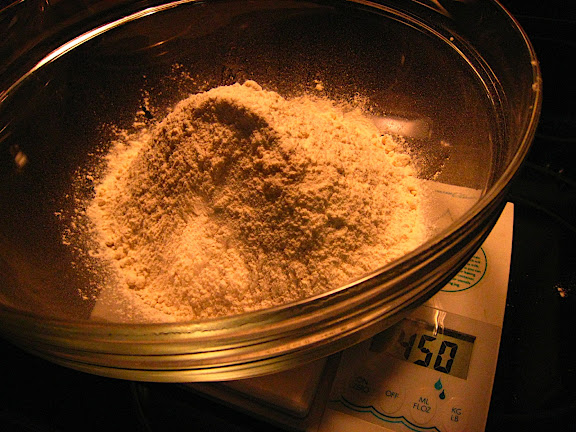


10. Zero the scale once again
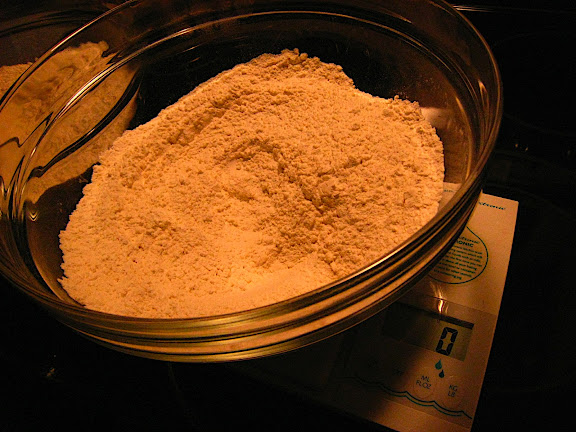


11. Add 325-350g water (carefully and slowly, you want to keep the dough a bit dry)
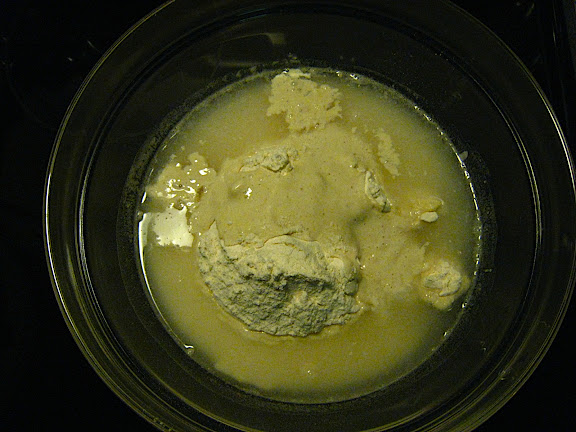


12. Start to mix the dough, I use a wooden baton
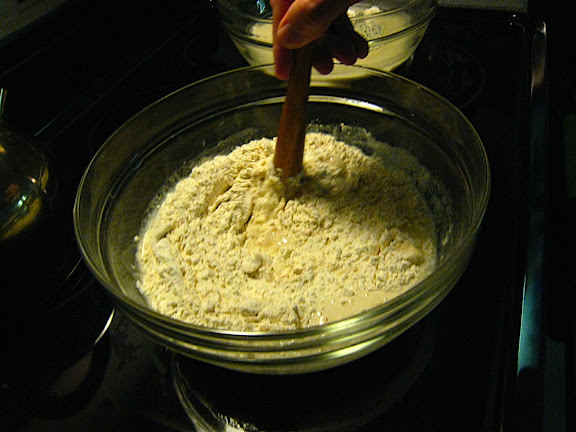


13. It will come together
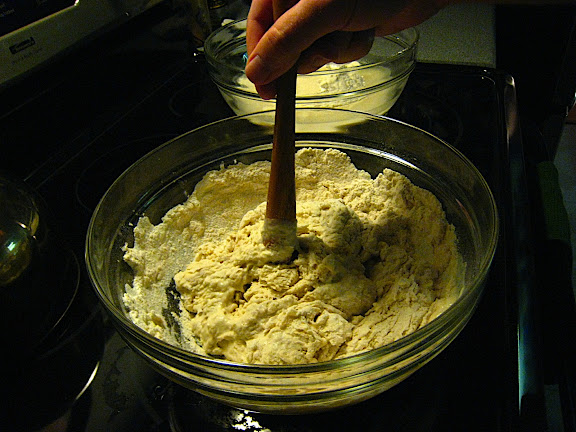


14. And eventually start to look like this
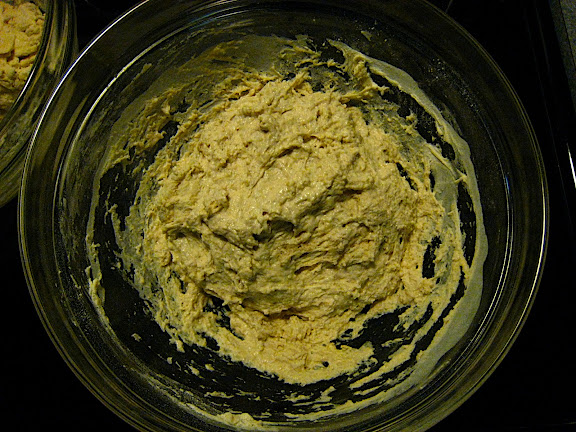


15. Though the consistency you are looking for is closer to this (dry)
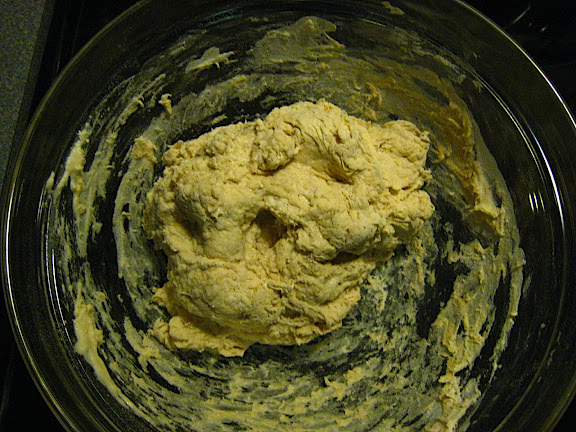


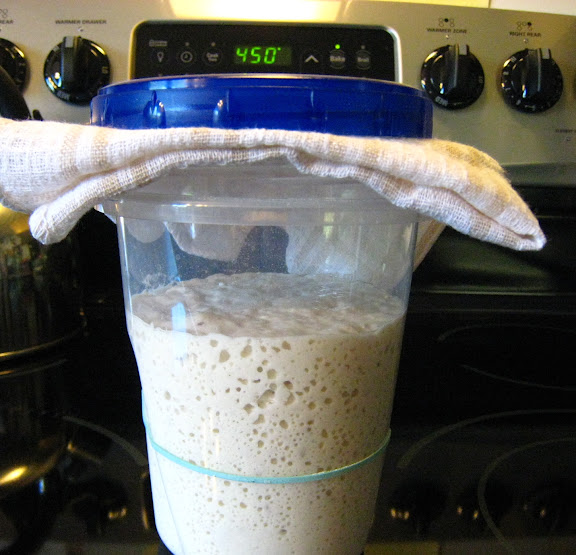
16. Cover (I do two batches at once) and let mix & rise overnight (8-11 hours)
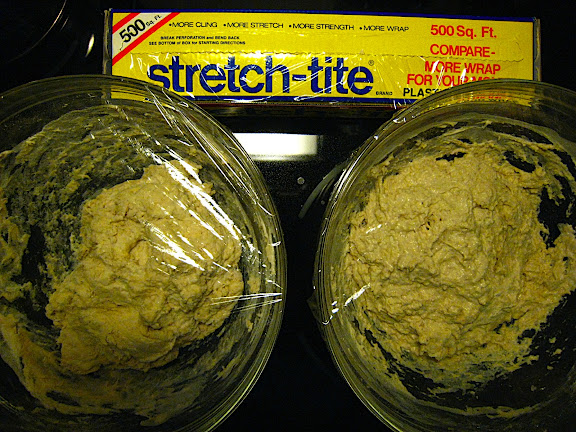


17. This is what you will wake up to (top view)
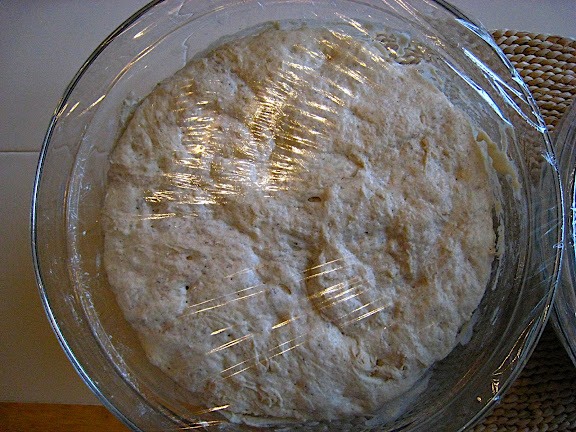


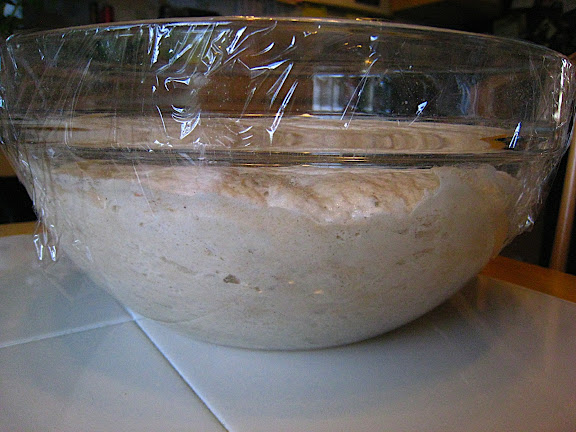
18. Side view


19. I get my workspace set-up with plenty of flour for dusting
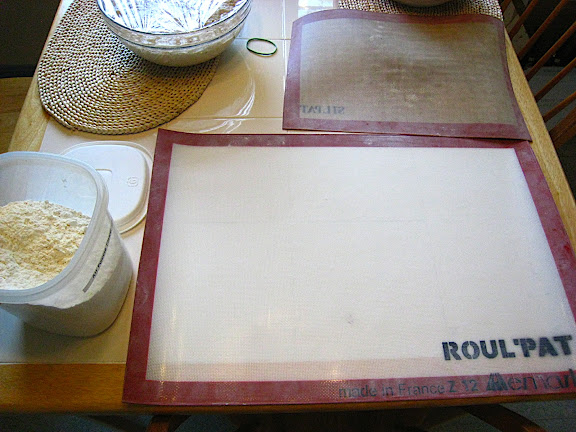


20. Spread out a layer of flour
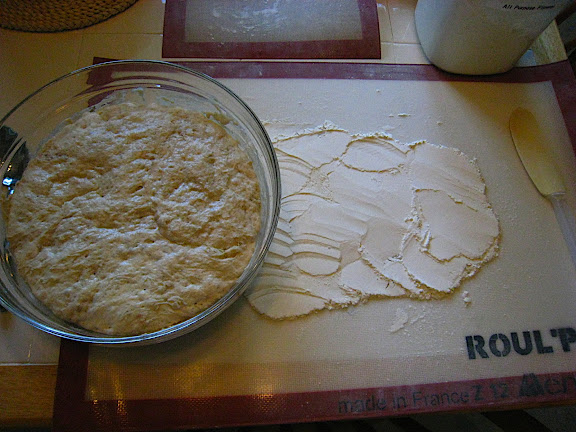


21. Scoop out the dough onto the flour
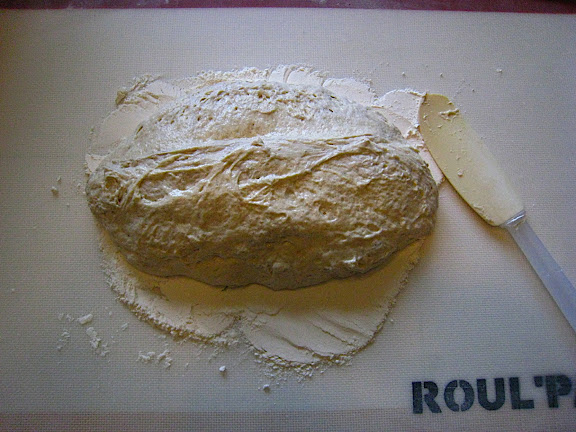


22. Fold over the dough
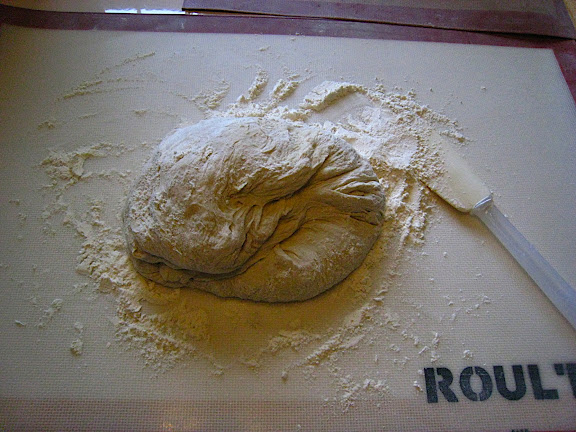


23. Fold over again, covering with flour


24. Prepare a pot (or bowl) with parchment paper and Rice Flour (more on that in another blog post)
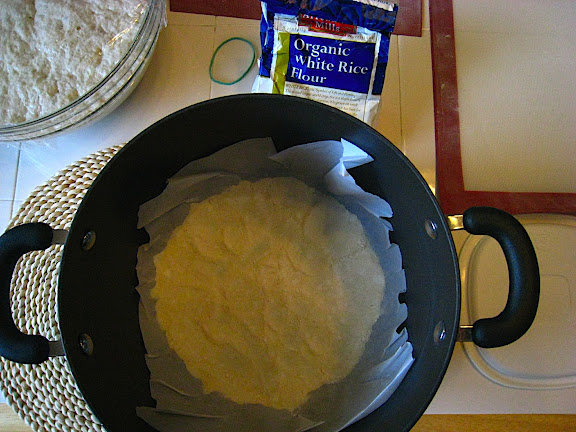


25. Place the dough (formed into a semi-tight ball) in the pot
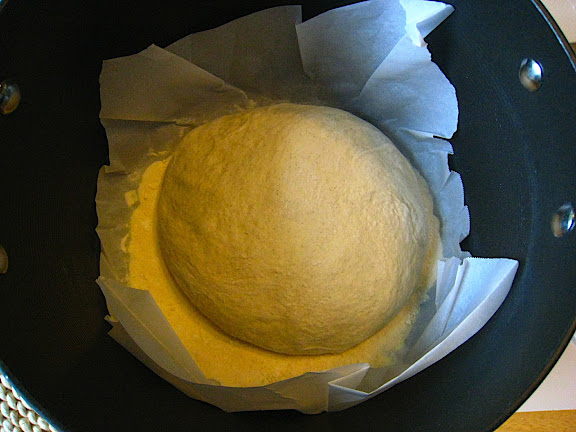


26. Cover with saran wrap again and allow to rest for 45-95 minutes
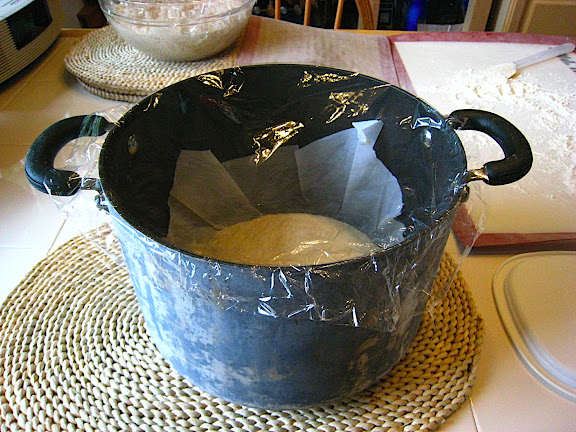


27. The dough will have "proofed" and will look like this
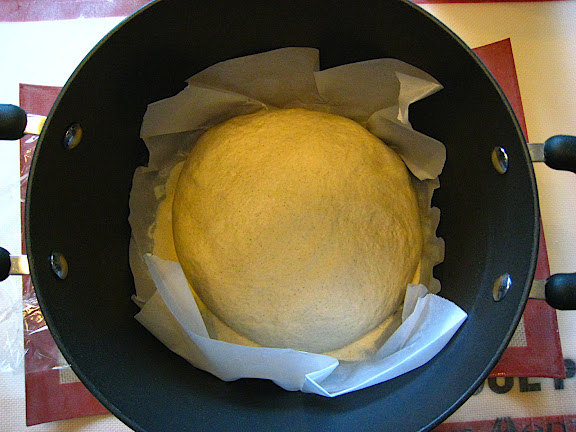


28. Take the pre-heated (45 minutes) dutch-oven out of the 450 degree oven
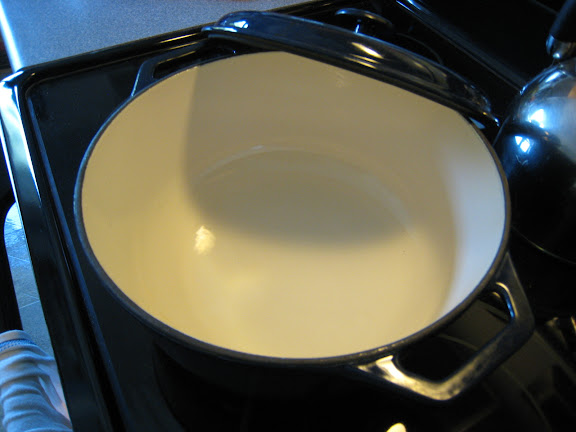


29. Using the four corners of the parchment paper, transfer the dough from the proofing pot/bowl to the dutch oven (be careful NOT to touch the sides!)
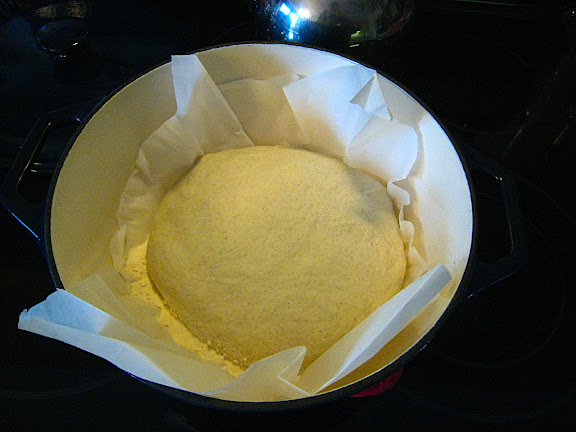


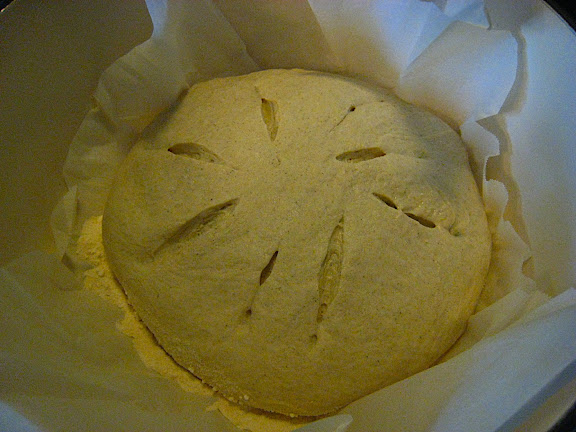
30. Slash the top of the loaf with a razor-blade


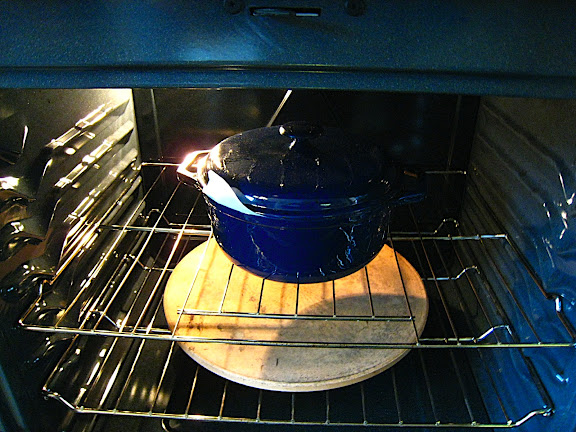
31. Put the dutch-oven lid on and slide into the 450 degree oven for 26-27 minutes


32. After 26-27 (or 30 depending on your oven) minuets, open the oven and take the lid off, close the oven door for another 13-15 minutes
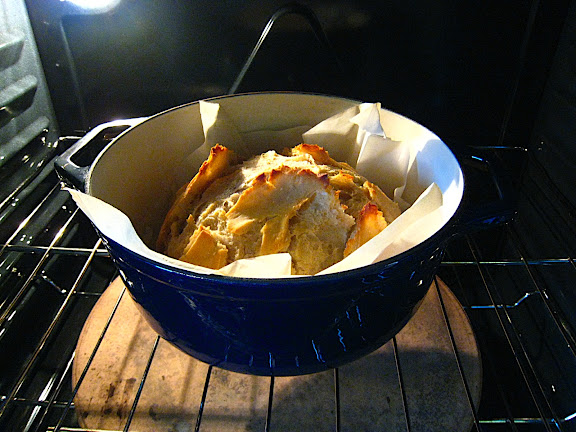


33. Finished product (after approx 45-55 minuets baking @450 degrees)
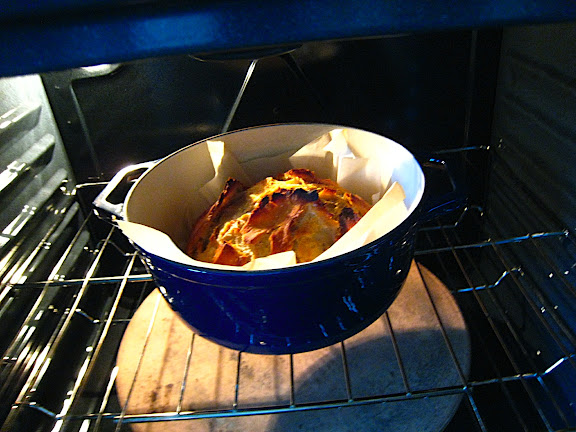


34. Carefully remove the dutch-oven from the oven and the bread from the dutch oven (again use the corners of the parchment, but be careful of the sides) and transfer to a wire cooling rack
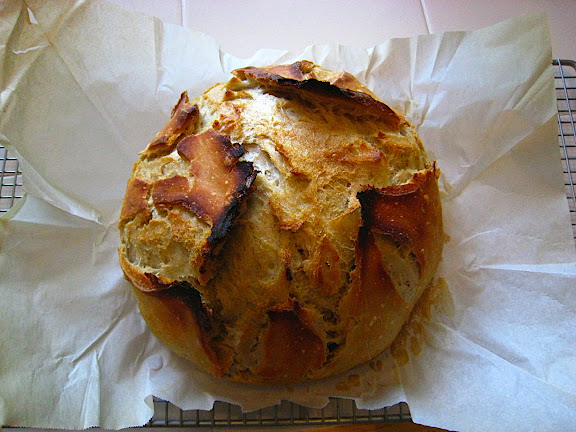


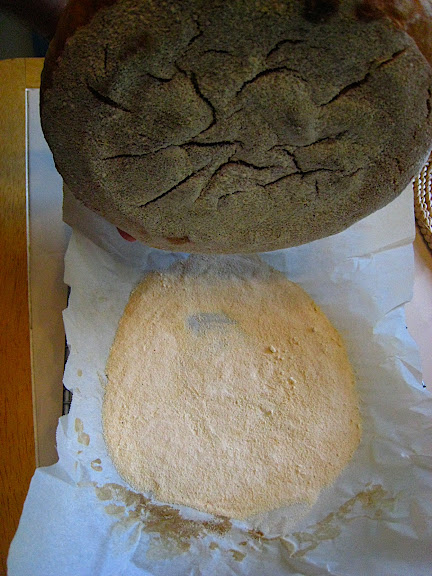
35. Allow to cool for at least 60 minutes and then dust the rice flour off the bottom of the loaf


36. Slice with your favorite bread knife and enjoy!
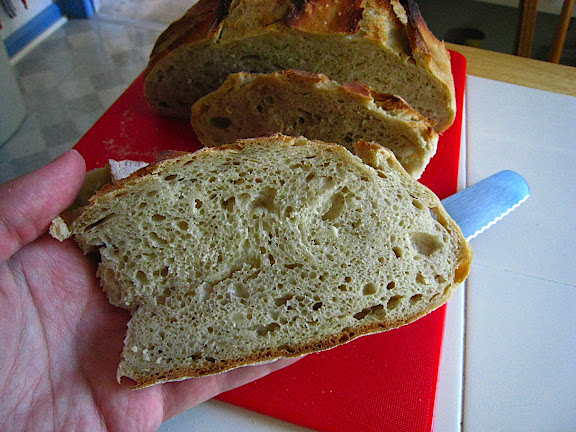


37. bon appetit !


-Matt the weekend Baker

Saturday, August 16, 2008

Sourdough Starter Rising


Just a bit of fun today. This is what Sourdough Starter looks like while it's rising. There are many factors that go into cultivating a good sourdough starter, time, temperature, food, water...

As Mike Avery shows on his http://www.sourdoughhome.com/ blog:
Time & Temperature are interdependent.


When I made the time-lapse video above my kitchen was approximately 75 degrees Fahrenheit (next time I'll display a thermometer). You can tell about 4.5 hours in (about 10am) the doubling had completed (the green rubber band is where it started).

I have such a long rise time (12-13 hours) because I can't come home from work in the middle of the day to refresh & feed the starter. So I compensate for the fast doubling time by increasing the ratio of flour & water to starter when feeding.

Most starter feed schedules call for doubling, I actually quadruple to keep the starter at it's fully doubled position for the 12-13 hours I use in my schedule. You can tell at the very end of the video that if I let it go for much longer (4 more hours) it would go 'flat' and eventually return to it's original level.

Go ahead, give it a try - it's not as hard as you think it is, my simple-to-follow instructions and schedule are in this post: http://matts-bread-log.blogspot.com/2008/08/weekly-sourdough-starter-schedule.html

-Matt the Weekend Baker

Friday, August 8, 2008

About My Blog

About 7 years ago some good friends of ours gave me a lump of rising bread dough in a Tupperware container and lent me a book about bread-baking by Beth Hensperger.

After my first experiment with baking bread in my kitchen I was enamored with the experience. Of course that first loaf was just the beginning. Someone else had made it, I just baked it. I wanted more so I opened the book and started on my journey to become a weekend baker.

After reading Beth's book (which unfortunately has gone out of print, but I believe it was:
Beth's Basic Bread Book) I decided to try my hand at the most traditional bread recipie - pain ordinaire (we know it as French Bread):
  • 1.5 packages (1.5 tablespoons) active dry yeast
  • 1 tablespoon sugar
  • 2 cups warm water (105-115 degrees Fahrenheit)
  • 1 tablespoon salt
  • 3 cups unbleached all-purprose flour
  • Cornmeal for dusting
  • Egg Glaze (see page 115)
I was confounded. Her book (an a few others I had checked out from the library) had told me that bread was 4 basic ingredients:
  • Flour
  • Water
  • Yeast
  • Salt
What was going on here? Why sugar? Egg Glaze? I was intrigued.

Of course the loaf came out a bit odd. I still did not know what to do or how to do it, but the tasted wonderful and I was committed to try again.

So after 365 weekends and 300+ loaves of bread I think I've hit my stride. I just hope I can share what I've learned here.

-Matt the Weekend Baker

Saturday, July 19, 2008

Weekly Sourdough Starter Schedule


Timing is EVERYTHING with sourdough starters & bread. Here's my weekly schedule to produce some great loaves each weekend:

Wed 2100 - Take sourdough out of the refrigerator

Thur 0500 - Feed Sourdough (stir, save 1/4 cup, add 1 cup water, 1 cup AP flour, stir)
Thur 1900 - Feed Sourdough (13h) (save 1/4 cup, add 1 cup water, 1 cup AP)

Fri 0800 - Feed Sourdough (13h) (save 1/4 cup, add 1 cup water, 1 cup AP)
Fri 2100 - Mix dough & Feed Sourdough (13h) - 100g used per loaf

Sat 0940 - Turn on oven to 450 with Dutch-Oven
Sat 1000 - Flour & kneed dough and let rest, Store Sourdough in the refrigerator
Sat 1030 - Transfer dough to Dutch-Oven and score
Sat 1100 - Remove lid from Dutch-Oven
Sat 1115 - Remove loaf from Dutch-Oven and rest on a wire rack
(Let cool completely)
Sat 1400 - Eat! (save any left-overs in a ziplock freezer bag, should be good for 5 days).

Enjoy!
-Matt the Weekend Baker